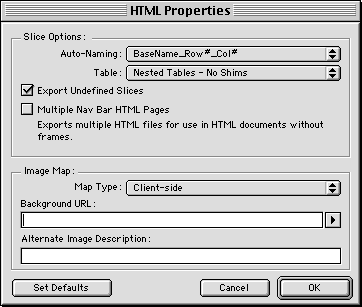
If you do not want to enter custom names for each slice, you can let Fireworks assign a unique name to each slice file automatically, based on the default naming convention.
This table illustrates the auto-naming options. In this example, the base name is "MyFile."
| Option | Result |
|---|---|
Basename_Row#_Col# |
MyFile_r01_c01 MyFile_r01_c02 MyFile_r02_c01 |
BaseName_Numeric |
MyFile_01 MyFile_02 MyFile_03 |
BaseName_Alphabetical |
MyFile_a MyFile_b MyFile_c |
Row#_Col#_BaseName |
r01_c01_MyFile r01_c02_MyFile r02_c01_MyFile |
Numeric_BaseName |
01_MyFile 02_MyFile 03_MyFile |
Alphabetical_BaseName |
a_MyFile b_MyFile c_MyFile |
Base Name is a name you enter when exporting. It becomes part of each exported slice file's name, according to the naming convention.
Row (r##) and Col (c##) designate the rows and columns of the table that Web browsers use to reconstruct a sliced image. They also become part of each exported slice file's name, according to the naming convention.
To automatically name slice files:
| 1 | Select one or more slices. |
| 2 | In the Object inspector, choose Auto-Name Slices. |
| 3 | When you export your sliced image, enter a name in the Base Name text box in the Export dialog box. Do not add a file extension to the base name. Fireworks automatically adds file extensions to slice files upon export. |
You can change the naming convention in the HTML Properties dialog box.

To change the default auto-naming convention:
| 1 | Choose File > HTML Properties to open the HTML Properties dialog box. |
| 2 | Choose a naming convention from the Auto-Naming pop-up menu. |
| 3 | Click the OK button. |
Note: To save all information on the HTML Properties dialog box as the default settings for new Fireworks documents, click Set Defaults.